Pages

Showing posts with label science. Show all posts

Tuesday, November 2, 2021

Solar and Lunar Eclipse

      What is the difference between Solar and Lunar eclipses? 


Solar Eclipse:

Solar eclipse happen when the moon blocked the light from the sun. We see darkness and light glowing around the edge of the earth. 1965 was the last time Solar Eclipse happen in New Zealand. The next solar eclipse in New Zealand will be in 2028 on Saturday.

Where to see the next solar eclipse | Astronomy.comSolar Eclipse Diagram | NASA


Lunar Eclipse:

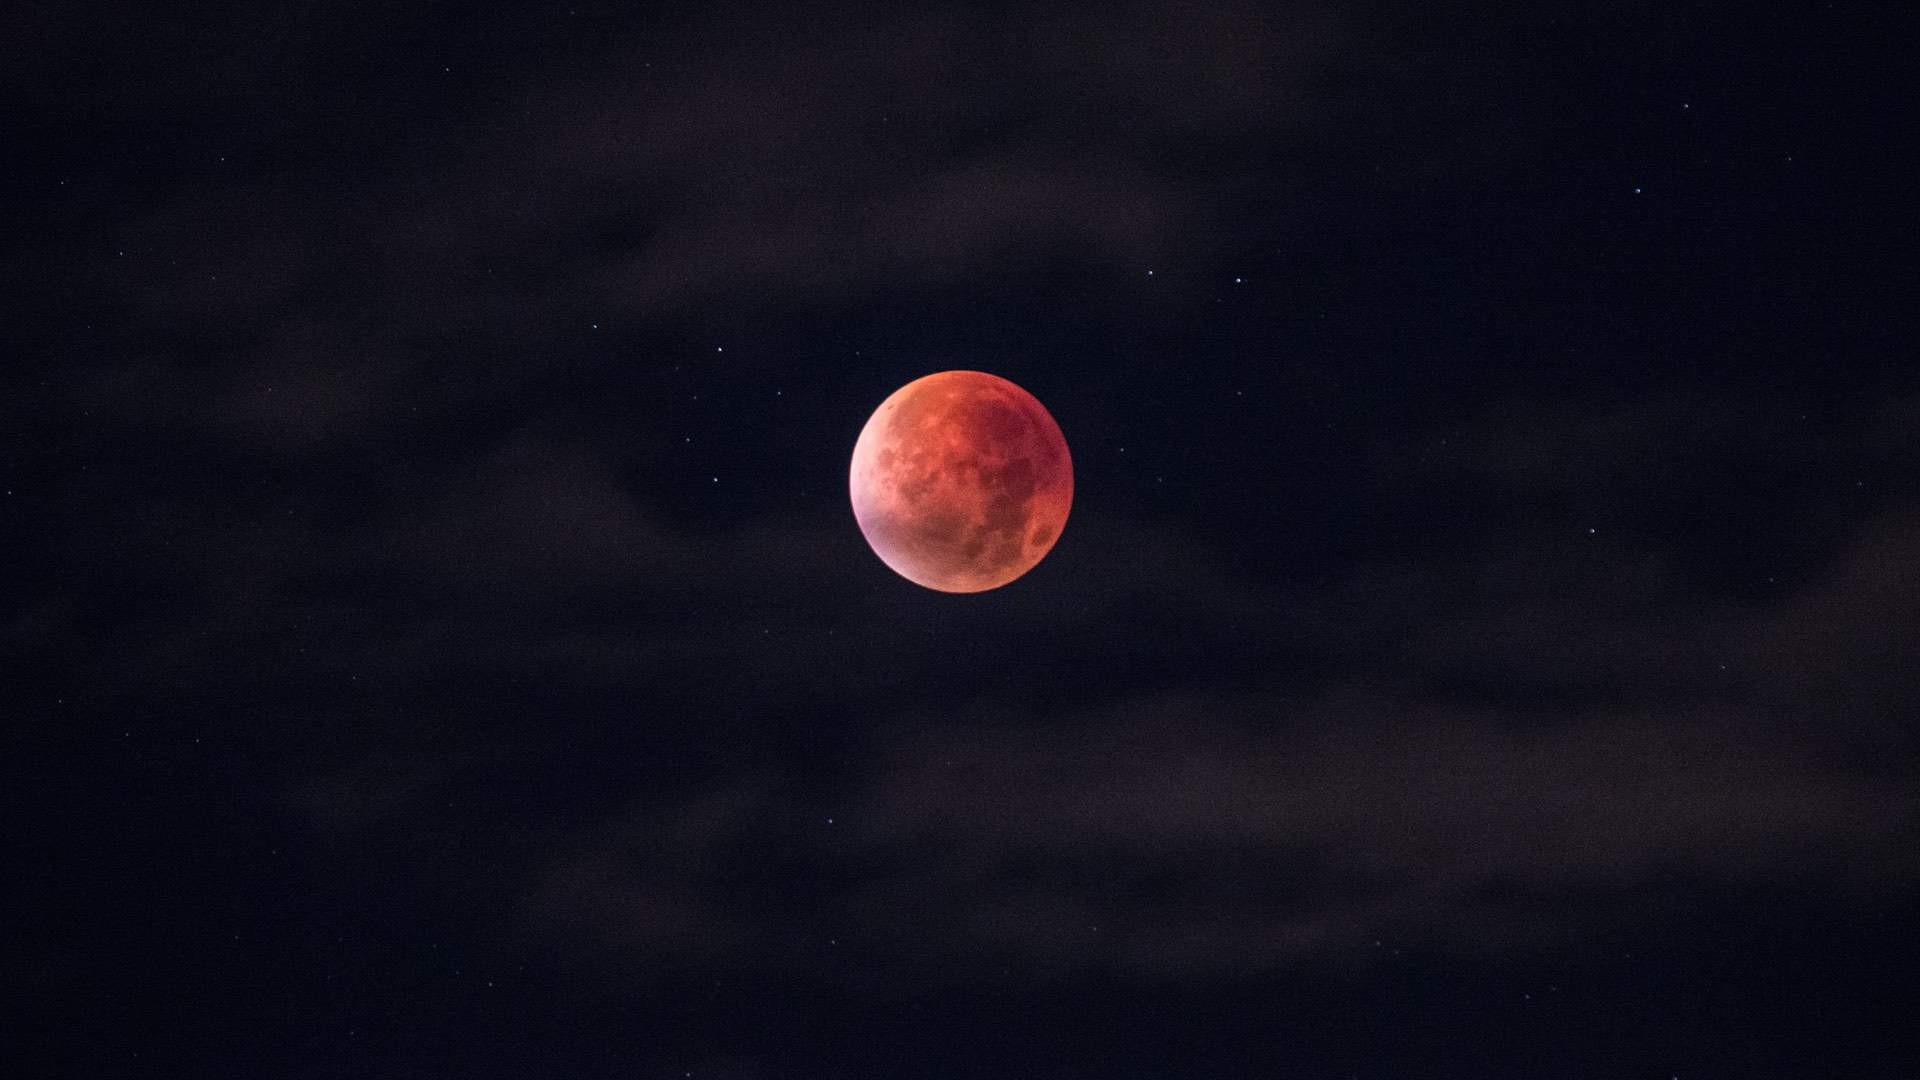
A lunar eclipse happens when the moon passes through the earth shadow. During the Lunar eclipse, we don't see the moon at all. 1965 was the last Lunar eclipse in New Zealand. The next lunar eclipse is on Fri, Nov 19, 2021, at 8:29 pm.

A 'Blood' Supermoon and Total Lunar Eclipse Will Be Visible in NZ This  Month - Concrete PlaygroundLunar Eclipse Diagram | NASA

Wednesday, October 27, 2021

Earth Science - Volcano

 Mayon Volcano

 Aim: To create a volcano and erupt them.

Method: We used scrap cardboard and Tristan brought a 1 Litre bottle. We then glue the bottle into the cardboard. After that we cover the bottle with Newspaper, forming the look of Mayon Volcano. On the second day of science after the glue had dried, we then painted our volcano maroon as the first coat. After few minutes the maroon paint had dried, and we now coloured it with green as the final coat. 

Research: Mayon Volcano is located in Albay, Philippines. It is called to be the world's most perfect volcanic cone because of the symmetry of its shape, it has a base 80 miles (130 km) in circumference and rises to 8,077 feet (2,462 metres) from the shores of Albay Gulf. The most recent eruptive episode began in early January 2018 that consisted of phreatic explosions, steam-and-ash plumes, lava fountaining, and pyroclastic flows. It was reported that the 2000 eruption displaced 14,114 families and damaged at least ₱89-million worth of property and crops. The myth of the creation of Mayon Volcano is as heated as the heart of the peak itself, with a plot involving star-crossed lovers, and a tragic ending leading to the rise of the jewel of Albay. Legend has it that a beautiful maiden, Magayon, lived in a place called.

Result:


Video: Preview attachment IMG_2123.mov

Discuss: The way volcanoes form is when one tectonic plate moves under another. Normally, thin heavy oceanic plates move under a more concentrated continental plate. When there is enough magma builds up in the magma chamber, it will then forces its way up to the surface and erupt, causing volcanic eruptions. The difference between Magma and lava is Magma is an extremely hot liquid and semi-liquid rock the can be found under the Earth's surface. If the magma flows onto earth it will then be called lava. 

Conclusion: Yes, our volcano science work. The eruption went up pretty high up and came down steaming. Maybe next time we will not make it super concentrated just to make it look like real lava.Mayon - Wikipedia


Wednesday, September 29, 2021

Science - Ecosystem Project

 Ecosystem Project

During science time, we have been investigating Habitats, ecosystems and the animals/plants that live in them. My group has decided to create a forest ecosystem. That have trees, rocks and bushes. The animals we have made are a rat, pterodactyl and a rabbit.

Dozens of various rats inhabit many different habitats and ecosystems. Because we are creating a forest ecosystem the rat shown is brown. Brown rats are the most common in the forest. 

Pterodactyls are carnivores meaning they only eat meat. Pterodactyls were believed to eat fish and small animals. So a rabbit and a rat would be the ideal food source for a pterodactyl to eat. In our ecosystem, the pterodactyl would be the predator while the rat and rabbit would be the prey.

Here are some pictures:


Monday, July 5, 2021

Wind Racer (Science)

 Aim: To make the most efficient wind racer which would either go the furthest or looks the most creative.

Equipment: Newspaper, plastic bag, tape, trolley, bamboo/metal rod, skewers.


Method:
  • Gather all your equipment

  • Set up your trolley and your bamboo stick, by placing the stick in the hole. 

  • Cut a plastic bag into a partially large rectangle a size that would suit the stick. 

  • Repeat with newspaper or paper. 

  • Tape your first rectangle to the rod.

  • Repeat with your other material. 

  • After use sticks to create a structure for the sail, we used skewers but you can use another material. - Since we used a whole newspaper page, we stuck 2 skewers together from the ends. Making it longer. 

  • Stick one pair at the top and another one at the bottom

  • Depending on the size of your sail and rod place one or two pairs in the middle too. 

  • After, make sure everything is secure by using tape in places that are weak. 

  • Finally, decorate to make the appearance look more appealing.


Result: German RC Wind Racer - FindGift.com

Discussion:  


After building the wind racer, we then went outside for the distance test. We used the leaf blower to move our wind racer. Our wind racer stop at a certain point where the wind of the leaf blower can't reach anymore. We put plastic in front of the cardboard so that it can catch the wind to push it. If we have used the metal stick then probably it could take more air since it's stronger. I forgot to take a picture of our wind racer so I just got a picture from the internet.


Conclusion:

The wind racer that we made turned good, it went pretty far but it stopped because the air of the leaf blower can't reach anymore. We raced with my classmate and I think our wind racer got 3rd/ 2nd place. In design, I think my group and I could still make it look better and make the sail more creative. Anyway, we had fun building our Wind Racer. I hope that if we do it again we will come 1st, and also we might change ours in a different position since our one got stuck in the grass after reaching the capacity of the air from the leaf blower.


Monday, May 17, 2021

Making a Metal Oxide

 Aim: To make a metal oxide and observe the difference in properties of the product compared to the reactant. 

Equipment: 

  • A piece of magnesium 
  • Bunsen burner 
  • Safety glasses 
  • Metal Scissor tongs

Method:

  1. Light your bunsen burner 
  2. Hold your piece of magnesium in the scissor tongs. Ensure you are holding onto the very tip of the magnesium. 
  3. Place the other end of the magnesium into the Bunsen flame (at the top of the blue flame)
  4. When the magnesium begins to burn, do not look directly at it, as the light emitted can permanently damage your eyes. 

Result:

Discussion: After we have covered the gas hole in the bunsen burner, the fire has changed to the colour blue which means it is really hot. We then hold the magnesium with the scissor tongs and put it right above the blue flame. In a very quick second, the magnesium started to burn while giving the effect of very bright light, while the magnesium is burning make sure to not look directly at it because it can forever damage your eye.   

Conclusion: What I think about the experiment that we did, is that it was really fun. I had a lot of fun doing the experiment and I'm looking forward to our next science experiment. 

Tuesday, May 11, 2021

Metal and Acids

Aim: To show that hydrogen gas is produced when a metal reacts with acid.

Equipment: 

  • A test tube 
  • A boiling tube 
  • Bunsen burner 
  • Wooden splint 
  • A bottle of acid
  • A piece of metal
  • Safety glasses
Method:  
  1. Add your sample of metal to your test tube. Add 2 mL of acids.
  2. Carefully invert the boiling tube above the test tube containing the metal and acid.
  3. Hold the test tubes together for a few minutes, allowing time for the inverted boiling tube to fill with gas.
  4. Light the flaming splint with a lighter.  
  5. Carefully, but quickly, tilt the boiling tube full of gas upwards and insert the burning splint into the mouth of the test tube.  
Result: 

As the result, the sound that we heard was "pop!". 


Test for Gases - Elevise

Discussion: 

As the metal is dissolving with the acids we quickly put the other test tube above it so that it won't release any Hydrogen gas. The more we wait for all the H2 to get trap in the tube, we see that it's becoming more grey, which means it is realising H2 ( Hydrogen gas). After a few minutes, we then call our teacher to light our splint, when the splint was on fire we quickly turn over the test tube and put the burning splint inside. The sound that it made was a loud "POP"!.

Conclusion:

I can tell that our experiment works because of the way the test tube made a sound. Maybe next time we will try to cover the tube so that the H2 won't scape, and also the sound will even be louder than we did last time. But anyway I like that experiment.


Monday, March 15, 2021

Making Indicators

Aim: To make acid-base indicators using everyday substances.

Equipment: 

  • Red cabbage
  • Tea 
  • Beetroot
  • Turmeric
  • Cranberry juice
  • A beaker
  • Water
  • Tripod
  • Bunsen Burner
  • Gauze mat
Method:

Task One:

For the Cabbage and Beetroot:  Chop the cabbage into small pieces until you have enough to fill 2 cups. Then place the cabbage in a large beaker and add water to cover the cabbage. After that boil over a Busen burner for at least ten minutes for the colour to leach out of the cabbage. Filter out the plant material to obtain a red-purple-bluish coloured liquid. Now you have to place it in a small beaker and leave it to one side, repeat these steps with the beetroot. 

For the tea: Put 100ml of water into a beaker and boil, turn off the bunsen burner and put three tea bags in the beaker. Then remove the tea bags when the tea is very strong. Once that is done place it in a small beaker and leave it to one side.

For the Cranberry Juice: Pour into a beaker and leave to one side. 

For the Turmeric: Mix 1 teaspoon turmeric in 100mL cup of alcohol. Then place it in a small beaker and leave to one side. 

Task Two:

  1. You now have five beakers, each containing a different indicator. 
  2. Using a pipette, place 5 mL of the cabbage indicator into two test tubes.
  3. Add 5 mL of HCI (Acid) to one test tube and 5 mL of NaOH (Alkali) to the other test tube.
  4. Record the changes in the table below.
  5. Clean the test tubes and repeat for the Beetroot, Tea, Cranberry and Turmeric indicators. 
Results:
 

Indicator

Colour in HCI (Acid)

Colour in NaOH (Akili)

Cranberry

Pink 

Green

Beetroot

Red

Yellow

Turmeric

Yellow

Orange

Cabbage

Pink

Green

Tea

Orange

Brown 

Discussion: When we were making the indicator, we did not do task 1 because we were not in the science room, so it means there will be no gas to plug in the bunsen burner. However, we just did task two. At first, we put a little bit of acid for the cranberry. I thought that the colour did not change when we put the acid because it was that still the same colour. After we put in some acids we then move to Akili. While we were pouring a little bit of NaOH in the Cranberry it has turned to colour green. We all did the same thing with the Beetroot, Turmeric, cabbage and tea entirely of them had a different colour for the Acid and Akili. You can see that by the table above the I have made to show you guys the results.

Conclusion: I really have enjoyed doing that experiment because it's just really entertaining to watch the change in a different colour. I am looking more forward to the next science we have for the next experiment. 


Wednesday, March 10, 2021

Testing PH

 Aim: To test the pH of a range of household chemicals.

Equipment: A variety of household chemicals, spotting tile, red litmus paper, blue litmus paper, Universal indicator solution, safety glasses and a pipette.

Method: 

1. Add a few drops od each chemical to a spot on your spotting tile. If a substance is solid or powdered you will need to mix it with a few drops of water before testing it. 

2. Test the chemicals with litmus papers.

3. Test each chemical with a few drops of Universal indicator.

Results:  


Discussion: The table that is shown above is how we tested all four chemicals. The first chemical that we have tested was the Spray and wipe, the way we tested those chemicals was we put a little bit of blue litmus with the Spray and wipe, when we have dropped the blue litmus it started to change its colour. The colour that shown was Violet. After the blue litmus, we then change it to the red one. Red litmus was a very surprisingly different colour from the first one that we did because the colour was different. The colour that appears in the red litmus was blue. It was really satisfying to watch the colour changes. All those steps were done to the four chemical that we experimented with(Fabric softener, Floor Cleaner and Vinegar).  

Conclusion: Our PH experiment works, I can tell that by the colours changing into a different colour. It was really fashionable to watch the litmus paper turn into another colour. 

Monday, February 22, 2021

Model Atom

 Aim: To make a model atom

Method:

  1. Choose an atom to make(one between Hydrogen and Neon)
  2. Work out how many protons, neutrons and electrons it has.
  3. Assign protons and neutrons to a particular colour bead.
  4. Get a ball of blue tack and stick the protons and neutrons to this to make your nucleus.
  5. Cut out the appropriate electrons shells and draw on the electrons with vivid. 
  6. Connect the nucleus and the electrons shells with a piece of string.
  7. Create a label to go above the model so people know what you have created.  

Results(pic): 

Discussion:  My discussion about the model atom is that I chose to do Carbon. Carbon represents C in the periodic table and common ion. Before I have made the Model atom the first thing I did was work out how many number of protons, electrons and neutrons there are. After finding out how many protons, electrons and neutrons there are, I found out that Carbon has 6 protons, 6 electrons and 6 neutrons. The way I arrange my Model atom is by putting 2 small dots in the first small circle and another 4 small dots in the big circles. The mass number of an atom is the total number of protons and neutrons. While the atomic number represents the number of protons. 2 Facts about carbon is that the Atoms are the smallest particles that makeup elements. And the second facts about carbon is that Atoms are mostly empty space.    

Conclusion:  My Model atom that I have made work as I expected. The one thing that I would change is the way I made the atom is that maybe I can make it tidier.

Wednesday, November 4, 2020

Blog about my experience dissecting the heart

What have we been learning? For the past few days in science, we have been learning what is a circulatory system and also how to dissect a heart. We are doing this to learn how does a heart work and their function are. 

Why are we dissecting heart? We are dissecting the heart so that we can learn all those labels and functions that we have learnt.   

What are the parts of the heart? Did you see them?

Atrium - The atrium is the upper chamber of the heart that receives blood.

Ventricle - The ventricle is responsible for pumping the blood away from the heart.

Valves - The purpose of the valves is to move the blood around the body.

Pulmonary Artery - The right ventricle artery which pumps oxygen to the lungs.

The two-part of the heart that we did not see is the vein and the atrium because it got cut off. 

Did you enjoy the dissection? Why/ Why not? I did enjoy the dissection because I've learnt a lot of different things that I did not know yet. 


Tuesday, September 15, 2020

Bones in the hands- Hurumanu 2

Last week in science we have been learning how do hands work, we made a hand to show you how it works. The hand has lots of parts which are Bones, Joints, Muscles, Tendons, and ligaments. These are all the parts that make your hand move. Bones is really helpful for us human because it helps us provide support. 

How do hands work? The movements of the hand are always started by the muscles in your forearm. Hands have a lot of things that help human beings one is we use our hand to write or hold something that is heavy or not. 

The human hand is made up of the wrist, palm, and fingers and has 27 bones, 27 joints, 34 muscles, and over 100 ligaments, and tendons, and many blood vessels and nerves.

Here is the demo that we did for our hand.

Monday, March 16, 2020

Chromatography

Aim: To separate the different pigments from ink using chromatography

Hypothesis: When I put the paper with colour in the water I think that the colour will not be separated.


Method:

1- Draw a line across the filter paper in pencil, 5cm from the bottom.
2- Draw a colored dot in the center of the line.
3- Measure out 10mL of water and place it in the test tube.
4- Place the filter paper in the test tube and fold over the side. MAKE SURE THE PENCIL LINE IS NOT IN THE WATER.

5- Wait for 5minutes and observe the results

Result: The purple turn into 3 different colour which is pink, purple and blue. Black turn into 4 different colours, which are blue, purple, black and orange.

Discussion: The purple had three different colour because it has 3 pigments on it. The black had four colours on it which means that it has many pigment on it.

Conclusion: My hypothesis was wrong because the two colours
had seperated and turned into a different colour.

Image result for chromatography


Thursday, August 8, 2019

Weather and climate change

Hurumanu - Weather

Weather and Climate Change 

Measuring weather.

Wind

Beaufort
Force
Wind Speed
(KPH)
SpinsIndicatorsTerms Used in NWS Forecasts
00-20Calm; smoke rises vertically.Calm
12-510Shown by direction of wind smoke drift, but not by wind vanes.Light
26-1240Wind felt on face, leaves rustle; ordinary vanes moved by wind.Light
313-2080 Leaves and small twigs in constant motion; wind extends light flag.Gentle
421-29130Raises dust and loose paper; small branches are moved.Moderate
530-39190Small trees in leaf begin to sway; crested wavelets form on inland waters.Fresh
640-50250Large branches in motion; whistling heard in telephone wires; umbrellas used with difficulty.Strong
751-61320Whole trees in motion; inconvenience felt walking against the wind.Strong
862-74390Breaks twigs off trees; generally impedes progress.Gale
975-87470Slight structural damage.Gale
1088-101550Seldom experienced inland; trees uprooted; considerable structural damage occurs.Whole gale
11102-116640Very rarely experienced inland; accompanied by widespread damage.Whole gale
12117 or more730+Very rarely experienced; accompanied by widespread damage.Hurricane

Wind speed - Making an anemometer.

Anemometer

MATERIALS


  1. 4 styropoam cups   
  2.   Pencil 
  3.   Pin 
  4. 4x  straws 
  5. Tape

STEPS

  1.   Make the straw into an x shape. 
  2.   Put the pin in the middle of the x.
  3.   Pin into the eraser of the pencil.
  4.   Stick the cup in the straw but the cup needs to be in the same way.
  5.   Put some tape on the cup so it will not fall or turn sideway.
  6.   Finally play with it. 
Once you have made an anemometer we are going to record the wind speed.

Group size: 5

You will need:

Anemometer (above) 

Roles:


  • Timekeeper
  • Counter
  • Recorder
  • Anemometer Manager
  • Wind generator
  1. Mount the anemometer in a place that has full access to the wind from all directions.
  2. When the timekeeper says "Go", the counter in each group will count how many times the marked cup passes them in one minute and write it down.
  3. If possible, repeat the above step four (4) times and record the average number of spins on the chart.

FINDINGS

  • Record how many times it spins using the table below.
You will need to create the wind yourself by blowing. Get 4 different wind speeds by blowing.

You will need to time them and count the number of spins.

Time IntervalNumber of Spins
1.10sec       8
2.10sec       12
3.10sec7
4.10sec       13
Time IntervalNumber of Spins
1.1m       48
2.1m       72
3.1m42
4.1m       78
  • Can you make a statement connecting the number of spins of your anemometer and the speed of the wind? 

CONCLUSION:

What happens is when we blow our Anemometer in ten-second the number of spins that we got in the first try was 8, so then we try to do it again but we went outside. The second time we try itgot 

Thursday, June 27, 2019

The water Cycle

Hurumanu: The Water Cycle


AIM: TO LOOK AT THE WATER CYCLE AND HOW CLIMATE CHANGE IS AFFECTING IT.

Definition: Water cycle is when the cloud evaporates the water from the ocean. Then after a while when the cloud is full of water, the clouds will release the water and put it back to the ocean, river, and lake. And it will do the same thing over and over again. 


Scientific words:


  • Evaporation. When water is heated by radiant energy it turns into water vapor.
  • Transpiration. Evaporation from plants.
  • Condensation. When water vapor cools, molecules join together and form clouds.
  • Precipitation. When clouds get heavy the waters falls as rain, sleet, hail, or snow.
  • Acidification: the action or process of making or becoming acidic.

We will be conducting an experiment that looks at the different ways that climate change is affecting the water cycle.

THE WATER CYCLE EXPERIMENT

Bag 1: Normal Water cycle
Bag 2: Water cycle with CO2 added: like Oceans in climate change
Bag 3: Water cycle with ice added: like Antarctica in climate change

Material:

  1.   Plastic Bag
  2.   Vivid Marker
  3.   Water
  4.   Food colouring.

Steps:

  1. Step 1 grab a plastic bag and put it on a table.
  2. Step 2 get a vivid pen and draw the cycle by drawing the sun, water, cloud, etc.
  3. Step 3 put 1 cup of water in the plastic bag after you draw the cycle. 
  4. Step 4 put 2 drops of food colouring.
  5. Step 5 put it in the window so the sun can shine on it. 

Steps:

  1. Step 1 grab a plastic bag and put it on a table.
  2. Step 2 get a vivid pen and draw the cycle by drawing the sun, water, cloud, etc.
  3. Step 3 put 1 cup of soda water in the plastic bag after you draw the cycle. 
  4. Step 4 stick the litmus paper on the top of the bag. 
  5. Step 5 put 2 drops of food colouring.
Step 5 put it in the window so the sun can shine on it.
Two Image: 


Findings: 


The Water Cycle: Bag 1
CO2 Water Cycle: Bag 2
Acid
Desert Water Cycle
Bag 3
Does it cycle?
yesyesyes 
Amount of Water
222
Acidity
121

Key: Water and acidity amount: 1 = none 
2 = small drips
3 = large drips

Other comments

1. Water cycle bag 1 had no acidity.
2. The bag 1, bag2 and bag 3 had small drips.
3. Bag 2 and 3 have acidity.


Conclusion: At the end of the science experiment we took two pictures of the work that we did and stick it in our window. To see what will happen for the next 4 or 5 day. So after 4 or 5 days some of the experiment did not work but it fine because we can just look at my classmate experiment.


TODAY YOU WILL BE INVESTIGATING THE EFFECTS THAT CLIMATE CHANGE HAS ON THE WATER CYCLE.

  1. Using your SOLO hexagons poster write a paragraph about the different aspects of climate change.
  2. Write about the following Climate Change concepts:
You can do these by powerpoint, embedding a movie , on your blog, on a doc or any other form of presentation. It is up to you.


What is deforestation? Deforestation is when people cut down trees in a big area. 
What is Icecap? Icecap is a covering of ice over a large area, especially on the polar region of a planet. 
What is acidification? The action or process of making or becoming acidic.
What is water vapor? Water vapor is when the water goes up in the atmosphere and make a cloud.


ACIDIFICATION: HOW DOES CLIMATE CHANGE CONTRIBUTE TO THE ACIDIFICATION OF OUR OCEANS?

  THE CO2 FROM THE ATMOSPHERE IS GOING DOWN TO THE OCEAN AND it's MAKING IT MORE ACIDIC. That happened because we are releasing too much carbon dioxide, so when it rains the water from the cloud is mixed with carbon dioxide.


Picture: Image result for acidification of our oceans


Diagram of how it affects the water cycle. 


DEFORESTATION AND CLIMATE CHANGE


DEFORESTATION: HOW DOES DEFORESTATION AFFECT CLIMATE CHANGE? 

It affects human if you cut all the tree the oxygen that we have will be less because we don't have enough tree to make oxygen. Also If you cut all the tree in the world the reflection of the sun will just go back up because there is no protection to trap it. 


Picture:Image result for deforestation


Diagram of how it affects the water cycle.


ICECAP MELT: HOW DOES ICECAP MELT AFFECT CLIMATE CHANGE? 

If all the ice melted the water will rise up then we will have a big flood. If we have a  flood we can't plant anymore tree to make our oxygen. The Icecap melt because of the heat we have in the earth, the ice can take any more heat so it will just meltdown and make the water rise up. 


Picture: Image result for ice cap melting


Diagram of how it affects the water cycle.


WATER VAPOUR: HOW DOES CLIMATE CHANGE CONTRIBUTE TO WATER VAPOUR AND EVAPORATION? 

As the climate gets warmer the temperature rise, and it will make more evaporation from the water sources, So that is increasing the atmospheric more of a  foggy content. If the earth is moist, It will make the road darker and we will also have less view. 


Image result for water vapour

Picture: 


Diagram of how it affects the water cycle.